
Customer support
越南锐拓仪器设备有限公司
电话:0923601989/中文:0394274737
电子邮件: ruituovietnam@gmail.com
地址: 北宁省, 桂武市, 凤毛坊, 张定路,160号
微信:13457827535
越南锐拓仪器设备有限公司
地址:北宁省, 桂武市, 凤毛坊, 张定路,160号
电话:0923601989/中文:0394274737
邮箱:ruituovietnam@gmail.com
Facebook:瑞拓越南
外部链接:www.szxhs.com
2
Tags: Contact angle meter
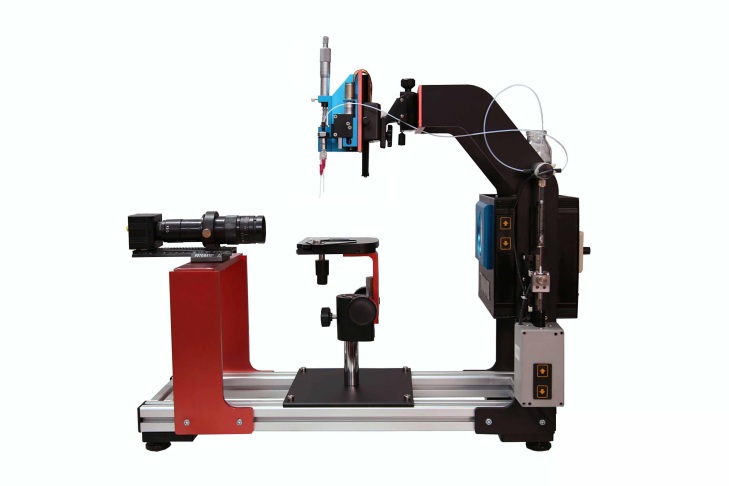
Product name: Transmittance brightness meter
Product code: WGT-S
I.Application:
1. Contact angle and wettability of liquid on solid surface: including static contact angle, dynamic contact angle (forward/reverse contact angle), contact angle hysteresis, etc.
2. The initial sliding angle (or rolling angle) of the droplet on the solid surface, the sliding speed;
3. Wetting behavior of liquid on the solid surface, such as spreading, permeation/absorption;
4. Solid surface free energy and the contribution of various molecular interaction forces (such as polarity/non-polarity);
5. Adhesion, retention, etc. of the liquid on the solid surface;
6. The results (effects) of the solid surface after cleaning and treatment are evaluated: such as cleanliness, homogeneity, and surface energy change;
7, liquid / flow - system surface / interface tension: including static, dynamic table / interface tension measurement;
8. On-site, online and real-time monitoring of surface/interfacial tension and surface active ingredient content;
9. Measurement of critical micelle solubility (CMC) of surface active substances (such as surfactants): including automatic CMC measurement, automatic screening and optimization of relevant formulations;
10. Research on the adsorption, alignment, orientation, relaxation and other phenomena of surface active substances at the interface;
11. Viscoelasticity and stability of the liquid interface: such as the stability study of the emulsion/foam system, etc., etc. Various interface phenomena and process measurement and analysis related to the liquid/flow/solid system.
II.(Principle analysis)
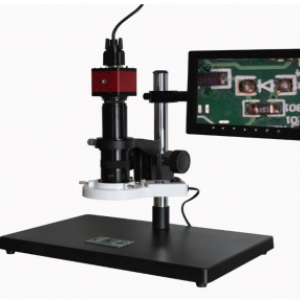
Our equipment adopts advanced dedicated CCD digital camera, double-resolution high-resolution zoom microscope and high-brightness LED background light source system. It can be moved with the three-dimensional sample table to move up and down, left and right, front and back. Achieve micro-injection and precise movement up and down, left and right. At the same time, the telescopic rod structure workbench is designed, which can adapt to the occasions where the thickness of different user materials is increased. The instrument frame can be adjusted according to the size of the pattern, which expands the scope of use of the instrument. The software is equipped with a correction function. After multiple tests, the results can be saved in the same report at the same time, which allows the user to better control the material data. The instrument is beautiful in design, simple in operation and meets the needs of users.
III. Specificationsa
(I) Antenna measuring instrument host:
(1) The host uses a high-strength aerospace aluminum alloy structure with a modular design concept,and independently developed integrated chip circuit control to ensure that the instrument operates in an optimal state;
(2) The imaging part uses a high-performance Japanese imported industrial movement and a distortion-free telecentric lens to ensure the best imaging results.
(3) Industrial grade adjustable LED single-wavelength cold light source system for clearer imaging
specification:
Mainframe dimensions: 360mm (width) * 550mm (length) * 450mm (height)
Host net weight: 11KG
Working table size: 120mm*150mm
Workbench move:
a) Move back and forth Manual, stroke 50mm, accuracy 0.1mm
b) Move left and right Manual, stroke 30mm, accuracy 0.1mm
c) Move up and down Manual, stroke 80mm, accuracy 0.1mm
Maximum sample stage size: 10 inches
Injector movement: up and down 100mm; left and right 100mm
Industrial lens movement: 30mm front and rear (fine adjustment 3mm)
Industrial lens: 0.7X *-4.5X HD continuous zoom microscope
CCD: SONY imported high-speed industrial grade chip; 25 frames / S
The angle of the lens can be debugged: head-viewing, multi-viewing
Light source: LED can adjust the blue tone industrial grade cold light source; the service life is more than 10,000 hours
Power and power: 220V / 60HZ
Contact:
越南锐拓仪器设备有限公司
地址:北宁省, 桂武市, 凤毛坊, 张定路,160号
电话:0923601989/中文:0394274737
邮箱:ruituovietnam@gmail.com
Facebook:瑞拓越南
外部链接:www.szxhs.com
2
Product
Online support
DUE THAC VIET NAM INSTRUMENT EQUIPMENT COMPANY LIMITED
- 越南DUE THAC仪器设备有限公司
Contact information
越南锐拓仪器设备有限公司
地址:北宁省, 桂武市, 凤毛坊, 张定路,160号
电话:0923601989/中文:0394274737
邮箱:ruituovietnam@gmail.com
Facebook:瑞拓越南
外部链接:www.szxhs.com
2
Map
Use of this website and the services means you agree to our Terms of Use and Privacy Policy.


